Last Indian

W-BodyTech Guru

Reputation: 29%
Joined
Sep 29, 2024
Messages
102
Recently I had posted on my suspension post about an issue with rear wheel hub bearings. I said I would post about the improvement upgrade as I was stepping through it. This is the beginning of that upgrade.

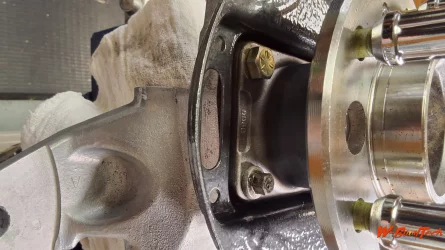
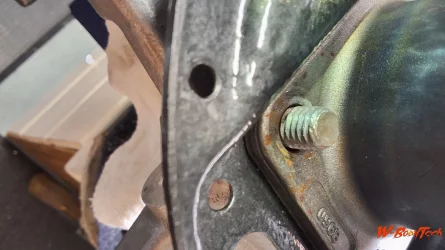
One of the other issues with the factory rear design are the bolt heads & fit. The compression part of the bolt head, the diameter, is to small & the fit of the bolt shank is far to small. The diameter of the through hole in the brake backing plate is .395 to .400, but the through hole in the hub bearing is .460! With the bolt size being 10mm (.390.), the more important fit is the bolt size to the hub bearing! So the whole setup is garbage! The clearance fit of the bolt to the hub bearing should be no more than .015 total, .0075 on a side, with .010 total or .005 on a side being ideal.
So here is the start of this improvement modification. My advice would be get a spare set of knuckles. So obviously I would recommend sandblasting or glass bead the knuckles if they’re not new.
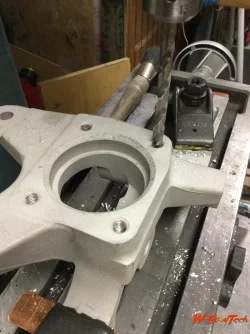
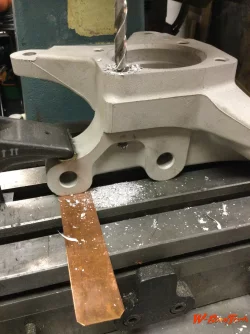
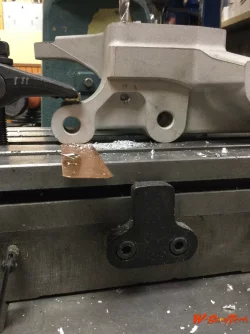
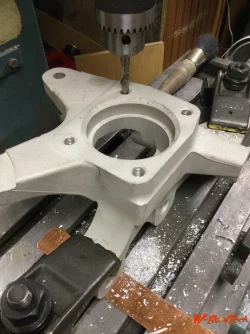
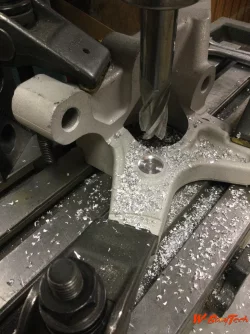
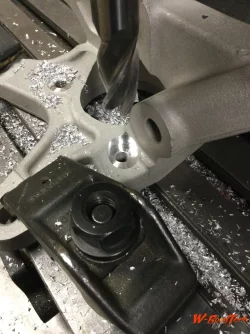
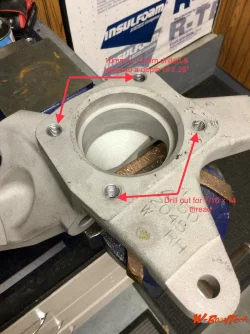
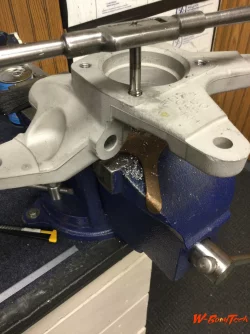
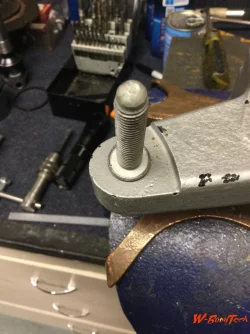
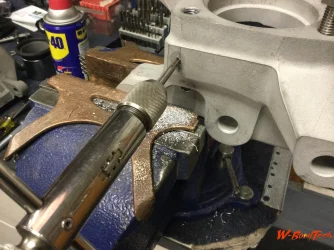
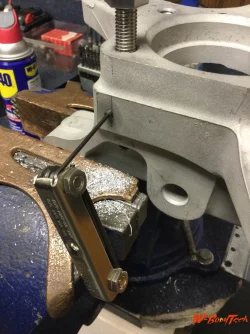
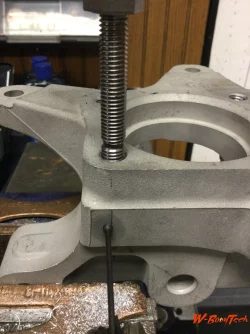
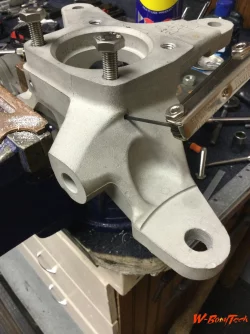
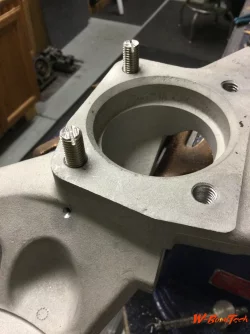
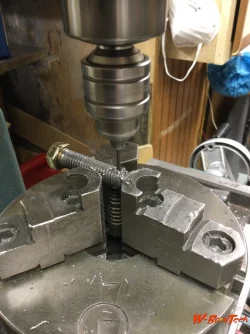
Now drill the two 10mm threaded holes that are on the opposite side from the caliper mounting flange of the knuckle deeper, about 2.250” deep total. These two holes are blind. The setup to do this should be done on a mill as you will see in the attached pictures.

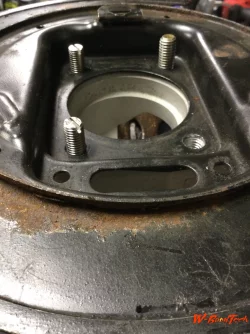
Now you will flip the knuckle over to spot face the backside of the two short 10mm through holes. This is done to make a flat surface for the new bolt arrangement that will be used. This arrangement will change the two through holes from 10mm x 1.5mm to 7/16 14 thread. This is done by drilling those two holes out to the tap drill size of a 7/16 x 14 bolt. Then tap the hole with a 7/16 tap. You will notice that drilling out the 10mm taped holes does not remove all the threads. That’s ok! Metric threads are a very different animal when compared to US threads! American threads are far & away superior to metric, fact based from the principles of what threads are! I don’t just say that because I’m American. Metic threads are weaker, strip more often & in general defy the good principles of threading, which is considered an art form! And has been from almost the beginning. I can speak to this later if someone wants to know more, but for now you’ll never know that there was ever a 10mm thread there when finished!

Next you will need to open up the two holes on the brake backing plate that corresponds to the 7/16 bolts. Drill them out to 7/16.
 

Attachments

  • A744C4C9-CCF7-49D5-AA4B-3A9162FF9F6D.webp
    A744C4C9-CCF7-49D5-AA4B-3A9162FF9F6D.webp
    264.6 KB · Views: 301
  • EEEFCF44-D4A9-4DDA-974D-4A6F8B097060.webp
    EEEFCF44-D4A9-4DDA-974D-4A6F8B097060.webp
    295.6 KB · Views: 302
  • C4DC971C-8740-4223-9124-04E7177C92C6.webp
    C4DC971C-8740-4223-9124-04E7177C92C6.webp
    279.2 KB · Views: 299
  • DBEC6DF7-5FED-4926-B3F6-843D4BE71841.webp
    DBEC6DF7-5FED-4926-B3F6-843D4BE71841.webp
    316.1 KB · Views: 302
  • 9AB6603B-75C4-462F-999B-0B2D4C8019DF.webp
    9AB6603B-75C4-462F-999B-0B2D4C8019DF.webp
    359.2 KB · Views: 246
  • 32980DA4-A8BC-43AF-A403-A87A13307442.webp
    32980DA4-A8BC-43AF-A403-A87A13307442.webp
    307.1 KB · Views: 293
  • 1208BF1D-B5DD-41D3-8D07-3E6E049A2C40.webp
    1208BF1D-B5DD-41D3-8D07-3E6E049A2C40.webp
    388.3 KB · Views: 249
  • 823C819D-AB79-4017-9CD9-02247BCC8DD8.webp
    823C819D-AB79-4017-9CD9-02247BCC8DD8.webp
    252.1 KB · Views: 246
  • 0FCDC70D-7DF1-4235-8389-91BD953B2EAA.webp
    0FCDC70D-7DF1-4235-8389-91BD953B2EAA.webp
    242.2 KB · Views: 283
  • 2CDA430E-9F21-4D2F-A419-65215C5A9A3E.webp
    2CDA430E-9F21-4D2F-A419-65215C5A9A3E.webp
    244.6 KB · Views: 246
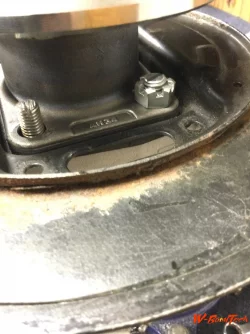
So before I move on with the detailing of the rest of this modification I want to show just how poor of an engineered setup this is! As I said before the head engineer that ok’d this design is a disgrace to the craft!

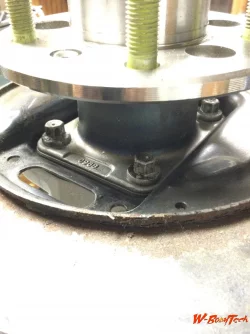
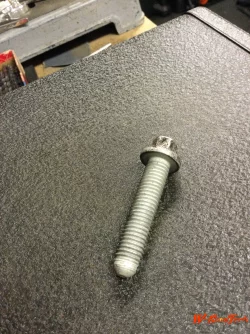
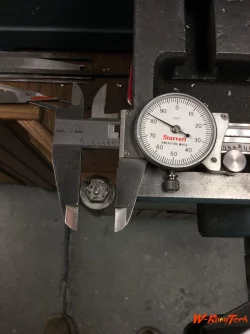
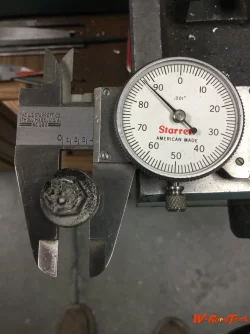
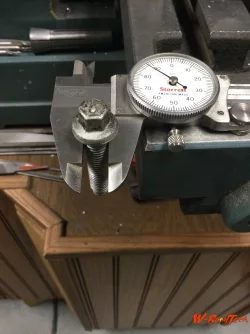
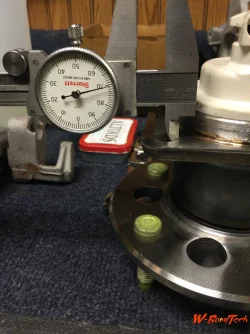
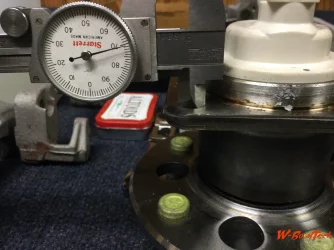
Look at the following pictures. First is the bearing hub bolt. The shoulder of the bolt head is .682 thousands by .100 thick. Yet the hole in the bearing hub is .470 thousands. Put in perspective that is only .106 thousands on a side bigger that the hole! On top of that the bolt shaft is .388 thousands in diameter. That is typical of a bolt thread as they are always a few thousands small diametrically, of which case means there is .294 total difference in diameter & .147 on a side! That is not how you engineer bolts & their respective fits. Considering the fact that these 4 bolts on each hub carry the entire transferred lateral load of the rear suspension; it isn’t surprising that under aggressive handling they fail.
 

Attachments

  • 654C6754-BA2B-44F5-B843-CCD58EEA2327.webp
    654C6754-BA2B-44F5-B843-CCD58EEA2327.webp
    266.1 KB · Views: 317
  • 507E72A2-BB9D-4EF1-8278-DB3E06F2F43D.webp
    507E72A2-BB9D-4EF1-8278-DB3E06F2F43D.webp
    176.9 KB · Views: 239
  • 958D824B-2163-45C8-AFBD-1433752DD0C2.webp
    958D824B-2163-45C8-AFBD-1433752DD0C2.webp
    743.9 KB · Views: 260
  • 49A0F0F0-CEFB-4CCC-999E-D2F1454D973B.webp
    49A0F0F0-CEFB-4CCC-999E-D2F1454D973B.webp
    243 KB · Views: 307
  • CE152FA5-44FE-4395-9339-1E79B998E594.webp
    CE152FA5-44FE-4395-9339-1E79B998E594.webp
    230.1 KB · Views: 272
  • FEDD3930-7A41-45F9-9439-4C1D1B52396A.webp
    FEDD3930-7A41-45F9-9439-4C1D1B52396A.webp
    194.8 KB · Views: 241
  • 70AC01C5-F90C-45B2-B0E0-5D58502510C2.webp
    70AC01C5-F90C-45B2-B0E0-5D58502510C2.webp
    258.3 KB · Views: 273
  • 13012D2D-AC08-40A9-9977-E0E3F5E58AAC.webp
    13012D2D-AC08-40A9-9977-E0E3F5E58AAC.webp
    230.8 KB · Views: 250
One more thing with regard to the poor design. In the attached picture of the factory hub bolt, look closely & notice the thin dark circle on the outer edge! This is the only contact this bolt is making in its clamping of the hub bearing to the knuckle! That is just pitiful!
 

Attachments

  • 72A6932F-A6C2-4716-B004-34480F7F40BA.webp
    72A6932F-A6C2-4716-B004-34480F7F40BA.webp
    263.9 KB · Views: 299
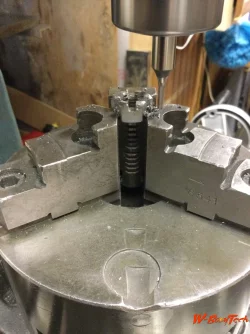
Now on with the modification that needs done for the other side of the knuckle. While the other 10mm threaded holes are now at around 2.250” deep you’ll need longer bolts. I would seriously suggest using 304 stainless steel! Why? Steel & aluminum don’t get along with each other & since these are blind holes the likely hood of there being electrolysis between them is inevitable with corrosion that will freeze them up, being that they are in a blind hole. This makes that corrosion difficult to effect because of that. So the difficulty of getting them out later maybe significant. So basically you I’ll make two long studs & set screw them. Where they interface with the set screws the threads will need to be removed by undercutting. For reference I used 8x32 thread set screws. I also cut a screwdriver slot into the top of each stud to use for installation.
 

Attachments

  • C3B64912-AB97-4678-A293-284067266689.webp
    C3B64912-AB97-4678-A293-284067266689.webp
    313.4 KB · Views: 265
  • 38F923F8-F203-427C-9B3C-D68C04EE29C5.webp
    38F923F8-F203-427C-9B3C-D68C04EE29C5.webp
    307.3 KB · Views: 245
  • BD56F247-1605-4B36-8111-A94E9AC324ED.webp
    BD56F247-1605-4B36-8111-A94E9AC324ED.webp
    275.7 KB · Views: 299
  • 28422D6E-A1F3-4A1A-9720-FC0C993CFC71.webp
    28422D6E-A1F3-4A1A-9720-FC0C993CFC71.webp
    247.5 KB · Views: 305
  • 5DDFDE13-5631-4C0B-A37D-135A2F3FEB08.webp
    5DDFDE13-5631-4C0B-A37D-135A2F3FEB08.webp
    253.2 KB · Views: 282
  • AB30FE6D-0040-442E-9FDB-1BA326ED6D49.webp
    AB30FE6D-0040-442E-9FDB-1BA326ED6D49.webp
    265.3 KB · Views: 295
  • B0052A92-4DFD-41DD-A5A1-98A8AEC595D0.webp
    B0052A92-4DFD-41DD-A5A1-98A8AEC595D0.webp
    256.7 KB · Views: 241
If you live in the rust belt and you've changed a rear bearing on a 2G and 3G W-Body, you know how much of a pain in the ass it is to dismantle the parts pertaining to the drum-in-hat parking brake due to everything that's exposed to the elements. The biggest PITA is the 2 bolts that retain the bracket where the parking brake cable attaches to the trip lever. They're torx bolts, but if exposed to any road salt they seize up. Your only recourse if you strip the torx head out is hoping you can get a vise grip on the sides of the bolt head. Fortunately (and many don't know this) this was corrected on the last remaining W-Body. In 2011, the Impala's rear brakes were redesigned, completely eliminating the drum-in-hat parking brake. They went back to a ratcheting caliper-style parking brake, nearly identical to the 1994-2001 1G & 1.5G W-Bodies. Removing the rear wheel bearings on these vehicles are MUCH easier than the earlier models!!
 
True enough! I live where the rust belt originated! Northeast Ohio! Salt mines under Lake Erie in Cleveland supply most of the country who use it with road salt. Worst idea ever! Well unless you consider PA’s stupid idea of cinders! Might as well driver your car through a sandblaster!
Anyway, fortunately I don’t drive the Indian in the winter, but the torx head bolts you speak of are dumb in any of the applications, IMO! I know why Camcar Industry says they invented them, but that just a bunch of hooey! You can do the same thing with an Allen wrench.
I changed virtually all of the bolts that could be changed in the Indian to either 304 or 316 stainless steel. Additionally any threads I could convert from metric to imperial I did. Which other than the engine & drivetrain, it probably accounts for more than 90%. So those bolts you speak of are now 316 SS Allen head. I don’t mind the drum in hat because at least in a worst case scenario even driving you have a brake of some kind! You know what was once called an emergency brake not a parking brake. The original style emergency brake you speak of is great if it’s not electronically activated, but a lot of them are. And those only work when the car stands still. That type of brake was the original emergency brake style used on 4 wheel disc in the day.
 
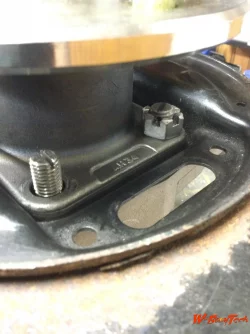
At this point the hub bearing is secured soundly. The two 7/16 bolts now only have .016 thousands clearance on a side when in the bearing hub! That’s a decent fit & will eliminate the bearings hub from any rotational movement. We also are now going to have a much larger clamping force on each hole of the bearing hub, but we are not done yet. Now comes the part that makes the complete failure of the bearing hub, I.E. wheel coming completely off the car, highly unlikely. Not to mention a much stronger more solid & robust setup that will now, like many other components that have been modified on the Indian, to reduce or eliminate flex, & subtle vibrations that keeps the suspension from transferring all the energy you can to where it belongs, the ground!

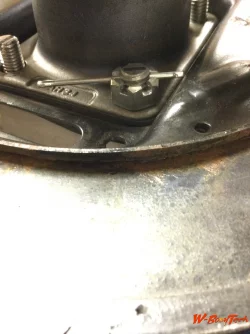
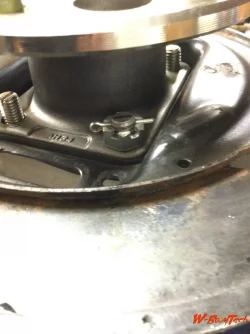
All 4 bolts are locked in place in the knuckle. The two 7/16 bolts have lock washers & are torqued to 60 ft lb. in the knuckle, more than what the factory specs call for. The two 10mm studs are locked in place by the 8-32 set screws. And now we are going to machine castle nuts for each bolt & drill each bolt for a cotter pin. This arrangement is as close as can be to a spindle arrangement from a safety & secure perspective. This is now a solid racing setup for hard aggressive cornering!
Still need to do the same arrangement for the 10mm studs.
 

Attachments

  • 26E13A3E-1E5F-4BB2-B998-E11E67D2CC01.webp
    26E13A3E-1E5F-4BB2-B998-E11E67D2CC01.webp
    270.5 KB · Views: 294
  • D8813117-ABD2-4A12-8C76-38247A52563A.webp
    D8813117-ABD2-4A12-8C76-38247A52563A.webp
    202.5 KB · Views: 310
  • 203BDF31-B5B6-4AB2-ADD8-42F7A819D381.webp
    203BDF31-B5B6-4AB2-ADD8-42F7A819D381.webp
    242.8 KB · Views: 298
  • F3627247-74C5-4B09-9DF1-15F0FB6A39FB.webp
    F3627247-74C5-4B09-9DF1-15F0FB6A39FB.webp
    187.4 KB · Views: 285
  • 3A6F0F54-9677-45B4-8FD5-D6BFA3DA5F4A.webp
    3A6F0F54-9677-45B4-8FD5-D6BFA3DA5F4A.webp
    180.4 KB · Views: 238
  • DFACB149-E040-4103-B188-D82B5C414A1C.webp
    DFACB149-E040-4103-B188-D82B5C414A1C.webp
    161.2 KB · Views: 303
  • ECD831FF-B629-4F45-97A1-35E99D39DDC5.webp
    ECD831FF-B629-4F45-97A1-35E99D39DDC5.webp
    192.6 KB · Views: 259
I always run SKF. SKF & Timken almost always made AC Delco bearings. And since 2000 SKF is pretty much the exclusive supplier to AC Delco. Also SKF uses heat treated high quality carbon steel the others don’t. As a result SKF hubs have the greatest load capacities in the industry. Another plus! Made in the USA! The only down side is their warranty! But I’ve never even come close to needing it. The hubs I’m currently running are still great after 20 years! The new hubs you see in the modification pictures are backups I bought at the same time I did the original build. When I get done with the upgrade work & pull the current assemblies of the Indian, I plan on using those hub bearings as those bearings were not the issue, the design of the mounting system was.
 
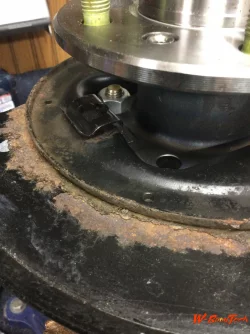
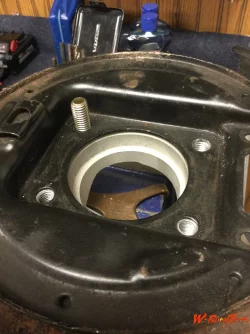
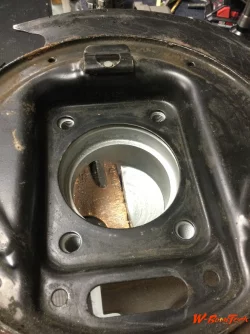
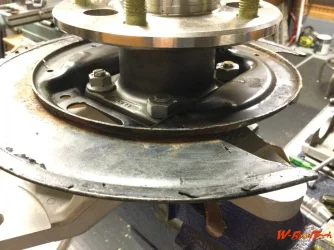
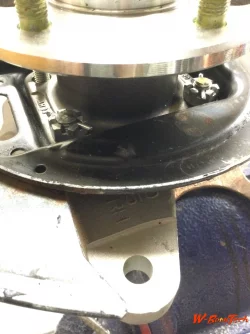
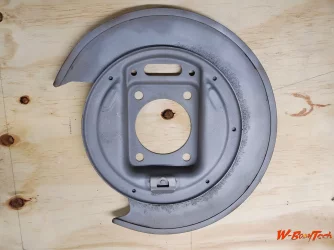
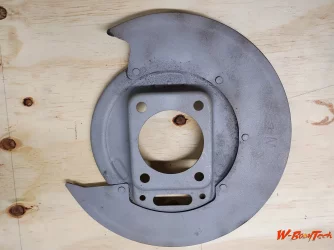
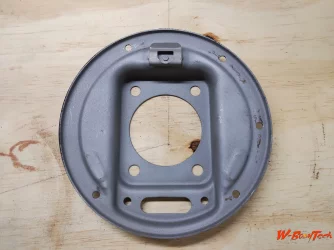
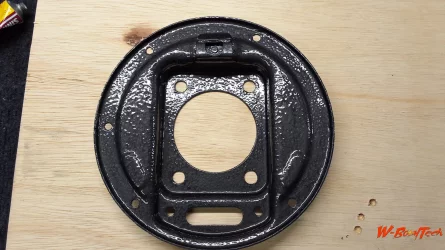
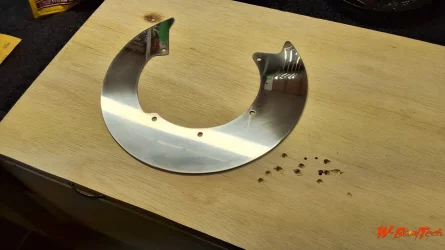
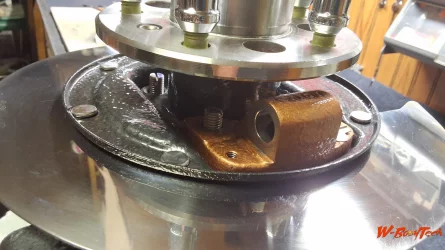
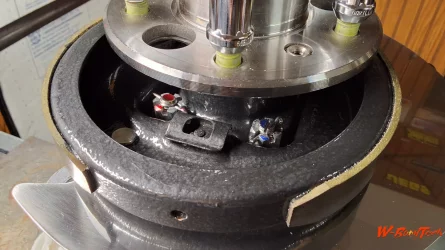
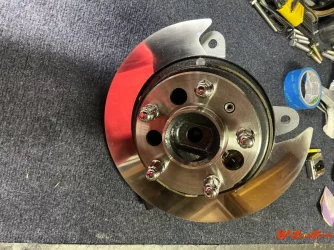
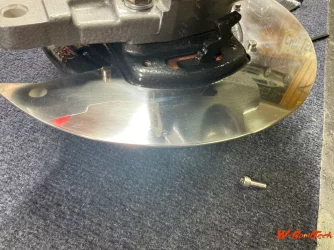
It’s been a while, but life often gets in the way! So I want to finish the rear wheel hub upgrade assemblies as complete drop in replacement as I have all the pieces parts. The backing plates are used units & as such need to be cleaned up & as a result of that once again I see an opportunity to increase their quality, durability & appearance. They consist of a two piece assembly. The main hub plate that helps house the wheel hub bearing & is the main structure for the parking brake. Then the other is an outer dust/deflector plate for the disk brake rotor. These two plates attach in a preformed rivet manner which works well for manufacturing & function, but not so much so for durability & duration, just makes a trap for debris that causes corrosion. I will separate the two & use only the main hub piece while replacing the outer dust/deflector piece with a fabricated 316 stainless steel piece. This will not only be more durable, but look better while resisting corrosion between the two plates.

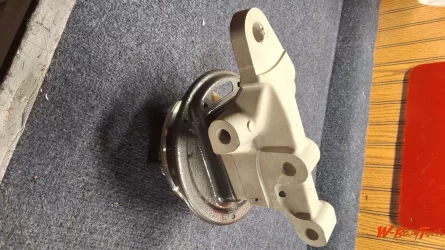
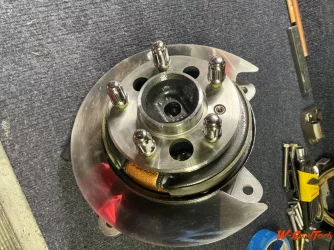
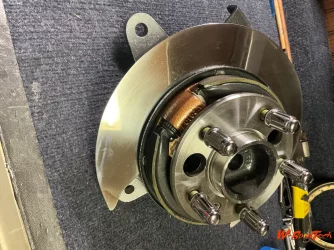
Getting back to rear knuckles/bearing hubs. As mentioned redoing the rear hub plates that attach to the knuckles & encapsulates the hub bearing & houses the parking brake. The outer shield that protects the rear disc has been removed & replaced with a custom stainless steel plate.

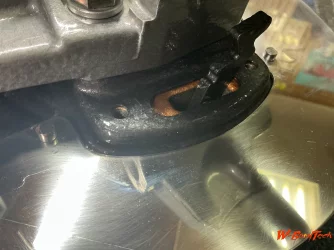
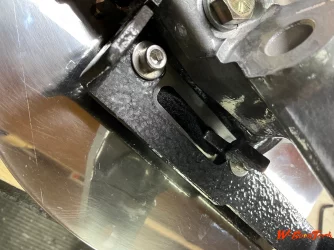
So I have just about finish all the mods on one side, including making a reasonable sealing setup for the parking brake, since there is no replacement for the OEM boot design. Now I need to disassembly the whole assembly. Go through it, lube the parking brake wheel cylinder, double check everything, reassemble torque all the bolts, install all cotter pins, etc, etc..

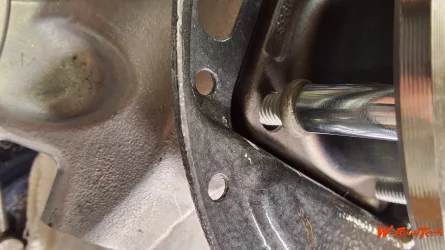
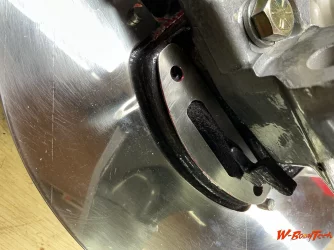
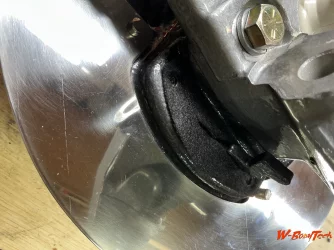
That said notice in the pictures the excess clearance between the original bolts & the clearance holes as well as the minimal amount of material of the bolt head that actually holds the wheel bearing in place. This is a huge design error for any aggressive handling!
 

Attachments

  • 1000000623.webp
    1000000623.webp
    387 KB · Views: 136
  • 1000000624.webp
    1000000624.webp
    456.3 KB · Views: 143
  • 1000000559.webp
    1000000559.webp
    292.8 KB · Views: 138
  • 1000000631.webp
    1000000631.webp
    296.4 KB · Views: 148
  • 1000000632.webp
    1000000632.webp
    213 KB · Views: 136
  • 1000000630.webp
    1000000630.webp
    388 KB · Views: 155
  • 1000000635.webp
    1000000635.webp
    226.9 KB · Views: 131
  • 1000000636.webp
    1000000636.webp
    267.4 KB · Views: 142
  • 1000000639.webp
    1000000639.webp
    187.2 KB · Views: 131
  • 1000000643.webp
    1000000643.webp
    197.3 KB · Views: 129
  • 1000000645.webp
    1000000645.webp
    230.2 KB · Views: 148
  • IMG_0091.webp
    IMG_0091.webp
    587.4 KB · Views: 146
  • IMG_0088.webp
    IMG_0088.webp
    594.7 KB · Views: 140
  • IMG_0093.webp
    IMG_0093.webp
    581 KB · Views: 133
  • IMG_0094.webp
    IMG_0094.webp
    613.8 KB · Views: 172
  • IMG_0095.webp
    IMG_0095.webp
    268.8 KB · Views: 153
  • IMG_0099.webp
    IMG_0099.webp
    370.3 KB · Views: 132
  • IMG_0100.webp
    IMG_0100.webp
    369.4 KB · Views: 144
  • IMG_0101.webp
    IMG_0101.webp
    351.2 KB · Views: 136
your attention to detail is absolutely insane. sorry for the late responses. as you said life really got in the way and finally catching up!
 
your attention to detail is absolutely insane. sorry for the late responses. as you said life really got in the way and finally catching up!
Well, I thank you for that. I try. Some think this is silly just use loctite. They are not generating over 9g’s in a 60 foot radius, 90 degree hard right hand turn. A 300 ft skid pad test is just one small test of a suspension & it really is a mild test when you are talking a true racing suspension.
 
Back
Top